A while back, there was a discussion on Munki-Dev floating the idea of local-only manifests. After some long discussion, the final Pull Request was created and merged.
The idea behind local-only manifests is simple: if you specify a LocalOnlyManifest key in the preferences, Munki will look for that manifest name in /Library/Managed Installs/manifests. If it finds it, it’ll look for any managed_installs and managed_uninstalls specified inside, and concatenate those with whatever it gets from the Munki server. It’s an extra place to specify managed installs and uninstalls that is unique to the client.
Essentially, what it does is move the unique-client logic from the server to the client. As you scale upwards in client numbers, having huge numbers of unique server-side manifests induces significant overhead – potentially 10,000+ unique manifests in your Munki server’s manifests directory gets unwieldy. With the uniqueness moved client-side, the server only has to provide the common manifests.
There’s a lot of neat things you can do with this idea, so let’s explore some of them!
Hang Out With The Locals
While the basic idea of the local-only manifest is simple, the implementation has some fun details you can take advantage of.
Local-only manifests do not have any catalogs of their own. Instead, they inherit from whatever catalog is provided by the manifest given from the ClientIdentifier key. Thus, if your main manifest uses the catalog “release”, any items specified in the local-only manifest must also be in the “release” catalog (or they will simply be treated like adding any item to a manifest when it is not in a catalog – which is to say that you will receive warnings).
Local-only manifests also don’t have their own conditional items. This is where interaction with third-party tools really begins to shine, but we’ll explore that later.
Because this is a unique manifest, you get the benefits that “real” manifests get. You can specify items to be installed here that are not provided as optional items in the server-side manifest (as long as they’re in the catalog). You can still get the server’s provided list of optional installs, and use the local-only manifest to determine what items become managed installs or removals.
This doesn’t absolve the Munki admin of taking care, though. It’s still possible for an item to be specified as a managed install in one manifest and a managed uninstall in another manifest – and therefore trigger a collision. Local-only manifests are just as vulnerable to that as server-side manifests, and it’s easy for a client to contravene the server-side manifest and result in undefined (or undesireable) behavior.
It’s my recommendation, therefore, that you split the purposes and logic behind the server-side and local-only manifests into separate functions – optional vs. mandatory.
One Manifest To Rule Them All
Because of the slightly limited nature of local-only manifests, it’s important to think of them as addenda to server-side manifests. The way to mentally separate these functions is to also separate “mine” vs. “yours” – the things I, the Munki admin, want your machine to have vs. the things you, the client, want your machine to have (or not have).
The easiest way to accomplish this is to completely remove managed_installs and managed_uninstalls from your server-side manifest. The server-side manifest thus becomes the self-service list and gatekeeper to all optional software. The Munki admins determine what software is available because they control the optional installs list as well as the catalogs, but the clients now have essentially free customizability without needing any ability to modify the servers.
Because the unique aspects of clients are now done client-side and not server-side, this allows an external management mechanism, like Chef or Puppet, to control what Munki manages on a client, without needing the ability to make changes to the repo. If your repo is in source control (and it should be!), this means that the only commits to the repo’s manifests are done by the Munki admins, and will only involve changes that generally affect the whole fleet.
Whence Does This Mystical Manifest Come From?
The local-only manifest moves the work from maintaining the manifest relationships on the server to maintaining them on the client. This is really only beneficial if you already have a mechanism in place to manage these files – such as a config management tool (Chef, Puppet, etc.).
Facebook CPE handles this with our cpe_munki cookbook for Chef. In addition to managing the installation and configuration of Munki, we also create a local-only manifest on disk and tell clients to use it. Manifests are just plists, and plists are just structured-data representations of dictionaries/hashes.
Nearly every programming language offers a mechanism for interacting with dictionaries/hashes in relatively easy ways, and Ruby (in both Chef and Puppet) allows for simple abstractions here.
Abstracting Local Manifests Into Simple Variables
I’m going to use pseudo-Ruby via Chef as the base for this, but the same principles will apply to any scripting language or tool.
The Process in pseudocode:
This file contains bidirectional Unicode text that may be interpreted or compiled differently than what appears below. To review, open the file in an editor that reveals hidden Unicode characters. Learn more about bidirectional Unicode characters
The point of the pseudocode above is to show how simple it is to abstract out what amounts to a complex process – deciding what software is installed or removed on a machine – and reduce it to simply two arrays.
To add something to be installed on your client, you add to the local managed installs variable. Same for removals and its equivalent variable.
What you now have here is a mechanism by which you can use any kind of condition or trigger as a result of your config management engine to determine what gets installed on individual clients.
Use Some Conditioning, It Makes It All Smooth
Veteran Munki admins are very familiar with conditional items. Conditions can be used to place items in appropriate slots – managed installs/uninstalls, optionals, etc. They’re an extremely powerful aspect of manifests, and allows for amazing and complex logic and customization. You can also provide your own conditions using admin-provided conditionals, which essentially allow you to script any logic you want for this purpose.
Conditions in Munki are critical to success, but NSPredicates can be difficult and unintuitive. Admin-provided conditionals are a convenient way to get around complex NSPredicate logic by scripting what you want, but they require multiple steps:
You have to write the scripting logic,
You have to deploy the conditional scripts to the clients
You still have to write the predicates into the manifest.
They’re powerful but require some work to utilize.
In the context of a local-only manifest, though, all of the logic for determining what goes in is determined entirely your management system. So there’s technically no client-side evaluation of predicates happening, because that logic is handled by the management engine whenever it runs. This unifies your logic into a single codebase which makes maintaining it easy, with less moving parts overall.
Some Code Examples
This is all implemented in Chef via IT CPE’s cpe_munki implementation, but here I’m going to give some examples of how to take this abstraction and use it.
In Chef, the local-only managed_installs is expressed as a node attribute, which is essentially a persistent variable throughout an entire Chef run. This array represents an array of strings – a list of all the item names from Munki that will be added to managed installs.
Additionally, we specify in the Munki preferences that we have a local-only manifest called “extra_packages”:
{
 'DaysBetweenNotifications' => 90,
 'InstallAppleSoftwareUpdates' => true,
 'LocalOnlyManifest' => 'extra_packages',
 'UnattendedAppleUpdates' => true,
 }.each do |k, v|
   node.default['cpe_munki']['preferences'][k] = v
 end
After a Chef run, you’ll see the file in /Library/Managed Installs/manifests:
$ ls -1 /Library/Managed\ Installs/manifests
 SelfServeManifest
 client_manifest.plist
 extra_packages
 prod
If you look inside that file, you’ll see a plist with your managed installs and removals:
This file contains bidirectional Unicode text that may be interpreted or compiled differently than what appears below. To review, open the file in an editor that reveals hidden Unicode characters. Learn more about bidirectional Unicode characters
When managedsoftwareupdate runs, it will concatenate the server-side manifest with the local-manifest, as described above. The sample plist above will ensure that six items are always going to be installed by Munki on my machine, and that “Tableau8” will always attempt to uninstall if needed.
With a setup like this, anyone who can submit code to the Chef repo can easily configure their machine for whatever settings they want, and thus users have individual control over their own machines without needing the ability to access any of the server manifests.
Even If You Don’t Have Config Management
You can still benefit from local-only manifests without needing config management. Manifests, including local ones, are just plists, and there are lots of ways to manipulate plists already available.
You could also add items to your local manifest using defaults:
Note the issue mentioned above, though, which is that it’s trivial for someone to add an item name that doesn’t exist in the catalog. Should that happen, the Munki client would generate warnings to your reporting engine. The benefits of using an external config management is the ability to lint or filter out non-existent items and thus prevent such warnings.
Summary
Ultimately, the benefits here are obvious. Clients have the ability to configure themselves without needing any access to the Munki repo. In addition, your users and customers don’t even need to have an understanding of manifests or how they work in order to get results. The entire interaction they’ll have with Munki will be understanding that items added to managed_installs get installed, and items added to managed_uninstalls get removed.
Stay tuned for a follow-up blog post about how this fits into Facebook’s overall managed Munki strategy, and how source control plays an important role in this process.
The following section is primarily a “state of the world” discussion of current Adobe licensing and deployment methods. If you’d rather skip the wall of text and go straight to the technical details, click here.
Among the many common tasks of a Munki admin, dealing with Adobe will be one that consistently generates sighs, groans, and binge drinking. Veteran Munki admins are no stranger to the constant supply of hilarity provided by deploying Adobe packages, and it’s a common topic of discussion. As of writing time, there are 697 results for “Adobe” on Munki-Dev.
The Munki wiki itself has pages devoted to handling Adobe products all the way back to CS3. I wrote a significant chunk of the current wiki page on handling Adobe CC, and that was back when the 2015 versions were the first CC products to deal with.
Now, of course, it’s all changed again as Adobe has introduced new “hyperdrive” style packages from Creative Cloud Packager (CCP), which required yet more work from the Munki developers to accommodate. While the actual installer package might be slightly more sane and operate slightly faster, the overall process for generating and deploying them hasn’t changed much.
As you might infer from all of this, packaging, preparing, and deploying Adobe software has been an ongoing struggle, with no signs of lightening up.
Licensing Is My Favorite Thing, Just Like Sausage Made Of Balsa Wood
For the release of the Adobe CC products, Adobe also introduced a new licensing style – “named” as opposed to the previous “serialized.” CCP allowed you to generate packages that would install the products in either Named or Serialized format, but they required completely different work on the backend.
“Serialized” Adobe products are what most admins are used to, and most admins are likely deploying, due to the Byzantine nature of Adobe licensing for enterprises.
From a technical point of view, though, “Serialized” is a simple concept – you install the product itself, and then you install the license as well. The license on the computer is an opaque black box that Adobe manages that determines what software is or isn’t allowed to run, or maybe will expire in 32,767 days. When you install new products, you reapply the license. Simple in concept.
“Named” licenses are also simple in concept, and actually more simple in execution as well. A “named” license product is only available to a user via an Adobe ID, through the Creative Cloud Desktop App (CCDA). This requires a fundamentally different licensing agreement with Adobe than “serialized” licenses, which is why most Munki admins and Apple techs in general don’t have much control over it – we aren’t usually the ones who sign the Dump Trucks Full Of Money™ agreements with vendors. Someone in Upper Management™ usually makes those decisions, and often without any input from the people who have to do the bulk of the work.
If you’re lucky enough to have an ETLA style agreement with Adobe, or Creative Cloud For Teams, you can probably use “named” licenses. The fun part is that you can have license agreements for both “named” and “serialized”, either together, or separate, that may expire or require renewal at different times.
The good news, though, is that “named” licensing doesn’t really require that much extra work. There’s no license package that needs to be installed on the client, and Adobe’s CCDA basically does all the work for determining what software users are allowed to use. From a technical standpoint, this is much easier for both users and IT operators, because there’s just less surface area for things to go wrong.
With “named” licensing and the CCDA, there aren’t real “releases” anymore. Rather than releasing yearly (or more) product cycles like the old “Creative Suite” 1-6, product changes are released in smaller increments more regularly, and the CCDA keeps things up to date without the admins having to necessarily rebuild packages every time.
Although there’s no official word on this, my suspicion (and this is entirely my personal opinion) is that “serialized” licensing will eventually disappear. We’re already seeing products released only on CCDA via named licensing (Adobe Experience Manager), which to me sounds like a death knell for the old “build serial packages and send them off” system.
So if you read the writing on the wall that way, the future for building serialized packages via CCP seems grim (as if the present use of CCP wasn’t already dystopian enough). I’m frustrated enough with CCP, Adobe packages, and “Adobe setup error 79” that I’m actually looking forward to a named-license only environment.
But of course, we don’t want to lose the functionality we get with Munki. Allowing users to decide what software they get and allowing them to pick things on-demand is one of the most useful features of Munki itself!
Now that I’ve spent 800 words covering the context, let’s talk about implementation.
Craft Your Casus Belli, Claim Your Rightful Domain
The ultimate goal of this process is to set up named licensing, get our users loaded or synced up into it, and provide access to the software entitlements we’ve paid for.
There’s lots of ways to go about this, but as is Facebook custom, we like solving problems by over-engineering the living daylights out of them. So my methodology is to try and set up all the pieces I need for self service by utilizing Adobe’s User Management API. We want this process to be as user-driven as possible, mostly so that I don’t have to do all the work.
The Org-Specific Technical Stuff
If you aren’t already familiar with it, the Adobe Enterprise Dashboard is the central location for managing Adobe named licenses. In order to maximize our integration, we want to use Federated IDs, where accounts are linked to our Active Directory (AD) infra. There’s various pros and cons to this, but if you’ve already got an AD + SAML setup, this is a good use case for it.
Step one in this phase of the process is Claiming Your Domain, where we claim ownership over the domain matching the email addresses we expect our users to authenticate with. This does require submitting a claim to Adobe, and they verify it and provide a TXT record that must be served by your outward-facing DNS (so Adobe can verify that you own the domain you say you do).
Once your domain is claimed and set up, we wanted to utilize our Single Sign On (SSO) capability. Adobe uses Okta to connect to an SAML 2.0-compatible SSO environment, so you and the team that manages your identity settings will need to do some work with Adobe to make that work.
The details of this process are documented in the links above, and is generally specific to your organization, so there’s no need to go into details here.
Learning To Fly (with the API)
Despite me covering it in three paragraphs, the above section took me the most amount of work – mostly because so much that was out of my control. Once you get past the difficult setup phase, the implementation of the User Management API becomes relatively painless – if you’re familiar with Python.
You can then upload this cert into the Adobe I/O portal.
Adobe doesn’t actually verify the cert for anything except confirmation that the private key and public key match, so there’s no technical reason in terms of the API why you can’t keep using it. It’s always a good practice to use a real certificate, but for initial testing, this works just fine.
Upload the cert to your Integration, and it’ll provide you with the values you’ll need for crafting your config file below.
Once you’ve got a cert and the private key, you can start writing the API script.
SNAAAAAAKE, OH IT’S A SNAAAKE
Adobe’s sample scripts are quite thorough, and they use Python, which works perfectly for Mac admins. The downside, though, is that you’ll need to install three custom modules on any client who is going to use this script to access your API.
There’s a couple of ways to handle this, so it’s up to you to decide which one you want to pursue.
You can download the source for each of those modules and build it manually, and then copy the built modules into a central location on the client where you can load them:
cd PyJWT-1.4.2
python setup.py build
Whatever method you prefer to use, you need to be able to run the Python interpreter and import each of those modules (specifically jwt and requests) successfully to use the API sample scripts.
[server]
host = usermanagement.adobe.io
endpoint = /v2/usermanagement
ims_host = ims-na1.adobelogin.com
ims_endpoint_jwt = /ims/exchange/jwt

[enterprise]
domain = my domain
org_id = my organization id
api_key = my api key/client id
client_secret = my api client secret
tech_acct = my api client technical account
priv_key_filename = my private key filename from above
The values for the [enterprise] section are all provided by the Integration when you upload the cert you created.
For example, for Facebook, it might look something like this:
The priv_key_filename must simply be the name (not the path!) of the file that contains your private key that you generated earlier.
Start Your Script
Most of the start of this script is ripped straight from the samples page:
This file contains bidirectional Unicode text that may be interpreted or compiled differently than what appears below. To review, open the file in an editor that reveals hidden Unicode characters. Learn more about bidirectional Unicode characters
The good news is that this (theoretically) works in both Python 2 or 3 (NOTE: I have not tested this in Python 3).
The initial part of the script just gets us the setup we need to make calls later. We’ll use jwt to create the JSON Web Token (which itself uses cryptography to use the “RS256” hashing algorithm to sign the token with the private key), and requests to make it easy to send GET and POST requests to the API endpoint.
You could write your own GET/POST tools, or use urllib2 or any pure Python method of accomplishing the same thing; requests isn’t technically a requirement. It just dramatically simplifies the process, and Adobe’s sample code uses it, so I decided to stick with their solution for now.
The Config Data
Before we can use the API, we’ll need to set up all the required variables and create the access token, the JSON web token, and the config data read from the file we created earlier. The Adobe sample documentation does this directly in a script, but I wanted to make it a bit more modular (i.e. I use functions). It’s a little bit cleaner this way.
First, let’s parse the private key and user config:
This file contains bidirectional Unicode text that may be interpreted or compiled differently than what appears below. To review, open the file in an editor that reveals hidden Unicode characters. Learn more about bidirectional Unicode characters
Next, we’ll need to craft the JSON web token, which needs to be fed the config data we read from the file earlier, and signed with the private key:
This file contains bidirectional Unicode text that may be interpreted or compiled differently than what appears below. To review, open the file in an editor that reveals hidden Unicode characters. Learn more about bidirectional Unicode characters
Yes, thank you, I realize “jwt_token” is redundant now that I look at it, but I’m not changing my code, dangit.
With the JWT available, we can craft the access token. This is where requests really comes in handy:
This file contains bidirectional Unicode text that may be interpreted or compiled differently than what appears below. To review, open the file in an editor that reveals hidden Unicode characters. Learn more about bidirectional Unicode characters
With all of these functions ready, it’s really easy to combine them together in a single convenient generate_config() function, which can be used by other public functions to handle all the messy work. The purpose of this function is to load up the config data and private key from a specific location on disk (rather than having to continually paste all of this into the Python interpreter).
This file contains bidirectional Unicode text that may be interpreted or compiled differently than what appears below. To review, open the file in an editor that reveals hidden Unicode characters. Learn more about bidirectional Unicode characters
Here, we’ve simply stored the private key and config file in /opt/facebook for easy retrieval. Feel free to replace this path with anything you like. The idea is that these two files – the private key and the config file – will be present on all the client systems that will be making these API calls.
Our config functions are all set up and good to go, so now it’s time to write the functions to actually interact with the Adobe API itself.
Let’s Ask the API For Some Data
All of the Adobe API queries use common headers in their requests. To save ourselves some time, and avoiding having to retype the same thing repeatedly, let’s use a convenient function to return the headers we need:
This file contains bidirectional Unicode text that may be interpreted or compiled differently than what appears below. To review, open the file in an editor that reveals hidden Unicode characters. Learn more about bidirectional Unicode characters
Now we have all the config pieces we need, let’s ask for some important pieces of data from the API – the product configuration list, the user list, and data about a specific user.
This file contains bidirectional Unicode text that may be interpreted or compiled differently than what appears below. To review, open the file in an editor that reveals hidden Unicode characters. Learn more about bidirectional Unicode characters
In order to control how much data is sent back from these queries (which can result in rather large sets of data), Adobe automatically paginates each request. These two functions both start at page 0 and continue to loop until the resulting request contains lastPage = True. Just keep in mind each individual request will only give you a subset of the data.
With a list of product configurations, a list of all users, and the ability to ask for data on any specific user, we actually have nearly all of the data we’ll ever need. Rather than combining these pieces ourselves, we can also query some more specifics.
Here’s how to get a list of all users who currently have a specific product configuration entitlement:
This file contains bidirectional Unicode text that may be interpreted or compiled differently than what appears below. To review, open the file in an editor that reveals hidden Unicode characters. Learn more about bidirectional Unicode characters
With that data, it’s also easy to get a list of all products a given user has:
This file contains bidirectional Unicode text that may be interpreted or compiled differently than what appears below. To review, open the file in an editor that reveals hidden Unicode characters. Learn more about bidirectional Unicode characters
With the above code, we’ve got the ability to ask for just about all the available data that we might care about. Now it’s time to start making some requests to the API that will allow us to make changes.
Hello, Goodbye, Mr. User
The obvious first choice here is the ability to create and remove a user. When I say “create a user”, I really mean “add a federated ID to our domain.” This is different than creating an Adobe ID (and see the links far above to see Adobe’s explanation of the difference between account types). Adobe does provide documentation for creating both types of accounts.
This file contains bidirectional Unicode text that may be interpreted or compiled differently than what appears below. To review, open the file in an editor that reveals hidden Unicode characters. Learn more about bidirectional Unicode characters
The next obvious choice is adding and removing product configurations to and from users:
This file contains bidirectional Unicode text that may be interpreted or compiled differently than what appears below. To review, open the file in an editor that reveals hidden Unicode characters. Learn more about bidirectional Unicode characters
If you’ve been looking carefully, you’ll note that all of these functions start with _, indicating that they’re intended to be private module functions. Although Python doesn’t really enforce this, the reason is because I wrote this module to have internal data functions, and external/public convenience functions.
The public functions are all meant to be completely independent. The necessary work of generating the config data (the access token, JWT, etc.) should be abstracted away from the public use of these tools, and therefore we need internal functions to do all this work for us, and external public functions that others can call without needing to understand what they do.
We’ve covered all the private module functions, so now let’s get into the convenient public functions.
I’m Doing It For The Publicity
The public functions here should represent common queries that someone might want to use this module for.
Let’s start by providing a convenient list of Adobe product configurations:
This file contains bidirectional Unicode text that may be interpreted or compiled differently than what appears below. To review, open the file in an editor that reveals hidden Unicode characters. Learn more about bidirectional Unicode characters
Take a look at this function, because you’ll see this same general strategy in all the rest of the public functions. We generate the config on the first line – by reading from the files on disk, and crafting the pieces we need on-demand. The config tuple is then used to feed the internal functions (in this case, _product_list() ). The end result is we get a nice Python list of all the product configurations, without any other unnecessary data.
We can do the same thing with users:
This file contains bidirectional Unicode text that may be interpreted or compiled differently than what appears below. To review, open the file in an editor that reveals hidden Unicode characters. Learn more about bidirectional Unicode characters
Note that these two functions are essentially identical.
Straightforward request: does a user exist in our domain? Does this user already have a federated ID?
This file contains bidirectional Unicode text that may be interpreted or compiled differently than what appears below. To review, open the file in an editor that reveals hidden Unicode characters. Learn more about bidirectional Unicode characters
Note that the above function can be slightly misleading. It only returns True if the user’s type is “federated ID”. This doesn’t technicallyanswer the question of “does this user exist at all”, but specifically answers “does this federated ID exist”?
Another useful query: does the user have a specific product entitlement?
This file contains bidirectional Unicode text that may be interpreted or compiled differently than what appears below. To review, open the file in an editor that reveals hidden Unicode characters. Learn more about bidirectional Unicode characters
While we’re on the topic of user management, here are public functions for adding and removing users:
This file contains bidirectional Unicode text that may be interpreted or compiled differently than what appears below. To review, open the file in an editor that reveals hidden Unicode characters. Learn more about bidirectional Unicode characters
Finally, we get the last pieces we want – public functions to add and remove product entitlements to users:
This file contains bidirectional Unicode text that may be interpreted or compiled differently than what appears below. To review, open the file in an editor that reveals hidden Unicode characters. Learn more about bidirectional Unicode characters
This module, all together, creates the adobe_tools Python module.
So… What Do I Do With This?
We have a good start here, but this is just the code to interact with the API. The ultimate goal is a user-driven self-service interaction with the API so that users can add themselves and get whatever products they want.
In order for Munki to make use of this, this module, along with the usermanagement.config and private.key files above, needs to be installed on your clients. There are a few different ways to make that happen, but shipping custom Python modules is outside the scope of this post. Suffice to say, let’s assume that you get to the point where opening up the Python interpreter and typing import adobe_tools works.
We’re going to use Munki to make that happen, but we’ll need a little bit more code first.
Adding A User And Their Product On-Demand
Before we get into the Munki portion, let’s solve the first problem: easily adding a product to a user. We have all the building blocks in the module above, but now we need to put it together into a cohesive script.
This is the “add_adobe.py” script:
This file contains bidirectional Unicode text that may be interpreted or compiled differently than what appears below. To review, open the file in an editor that reveals hidden Unicode characters. Learn more about bidirectional Unicode characters
You run this script and pass it a product configuration. It detects the current logged in user, and if that user doesn’t already have a federated ID, it creates one. Then it checks to see if the user already has that product entitlement, and if not, it adds that product to the user.
There’s a bit of handwaving done there, and some assumptions made – especially in regards to the logged in user and the email account. If you already have an existing mechanism for obtaining this data (such as code for doing LDAP queries, or some other endpoint/database you can query for this info), you can easily add that in.
This script needs to go somewhere accessible on your clients, so put it anywhere you think makes sense – /usr/local/bin, or /usr/local/libexec, or /opt/yourcompany/bin or anything like that. That’s up to you.
Feeding the Munki
At this point, we’ve got four items on the clients that we need:
/opt/facebook/lib/adobe_tools.py
/opt/facebook/bin/add_adobe.py
/opt/facebook/usermanagement.config
/opt/facebook/private.key
We’ve made the simple assumption that /opt/facebook/lib is in the Python PATH (as shown in the gist above, we can use a simple sys.path.append() to ensure that).
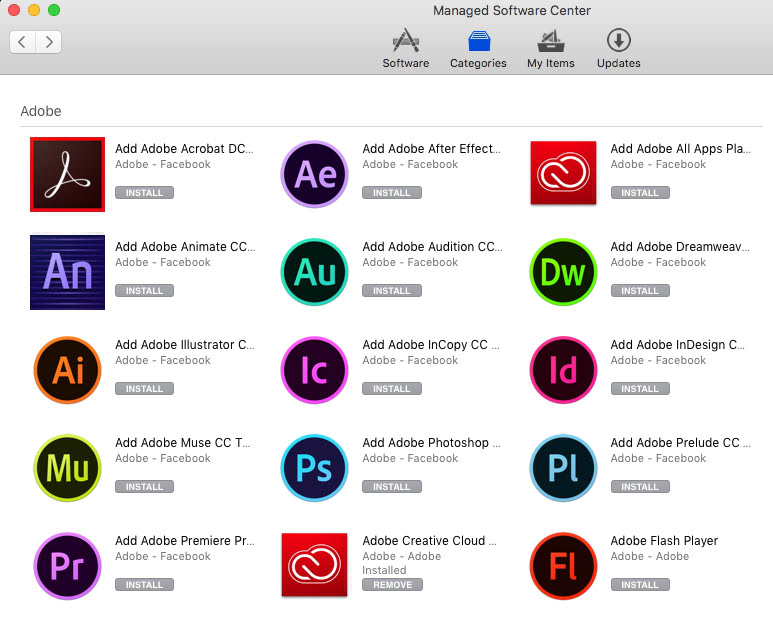
The only part left is providing the actual Munki items for users to interact with via Managed Software Center.app.
Although it isn’t covered in depth on the wiki, we can use Munki “nopkg” type items to simply run scripts without installing any packages. We’re going to combine this with using OnDemand style items so that users can click the “Install” button to get results done, but there’s no persistent state being checked. This essentially means we run the script every time the user clicks the button, which is why it’s important to be idempotent.
With everything on the client, our pkginfo is quite simple:
This file contains bidirectional Unicode text that may be interpreted or compiled differently than what appears below. To review, open the file in an editor that reveals hidden Unicode characters. Learn more about bidirectional Unicode characters
Note that Adobe Creative Cloud Desktop App is listed as a requirement. That’s not entirely true, but I think it makes a bit more sense for the user that they get all the pieces they need to actually use the software after clicking the Install button.
I’ve also added in the icon for Photoshop CC, although that’s purely cosmetic.
Add this pkginfo to your repo, run makecatalogs, and try it out! Logs look something like this:
After that, log into Adobe CCDA and the software will be listed there for installation.
Now Add Them All!
Add one of these pkginfos for each of your product configurations that you want users to select. The end result looks kind of nice:
After clicking all of the buttons, CCDA looks very satisfied:
Self-service Adobe CCDA app selection, using Munki and the Adobe User Management API. No more packaging, no more CCP!
Some Caveats and Criticisms
Despite the niftiness of this approach, there’s some issues to be aware of.
The API Key Is A Megaphone
The main problem with this approach is that the API private key has no granular access over what it can and can’t do. The only thing you can’t do with the API private key is make a given user a “System Administrator” on the Enterprise dashboard. But you can add and remove user accounts, add and remove product entitlements to users, and make users product admins of whatever they want.
In most cases, this isn’t a huge deal, but there’s some potential for mischief here. If every single client machine has the private key and necessary config data to make requests to the API, any single client can do something like “remove all users from the domain.” What happens to your data stored in Creative Cloud if your federated ID is removed? I imagine we’d probably prefer not to find out the nuances of having your account removed while using it.
There are some different ideas to address this, though. Instead of storing the key and usermanagement config file on the disk persistently, we could potentially query an endpoint hosted internally for them and use them for the duration of the script. In this theoretical scenario, you could control access to that endpoint, perhaps requiring users to authenticate ahead of time, or logging / controlling access to it.
Throttling Requests
One thing I didn’t mention above at all is that the number of requests in a given time frame need to be throttled. Adobe has great documentation on this, including some exponential back-off code samples. We didn’t implement any of this in this initial proof-of-concept, but if you’re going to roll this to a large production environment, you’ll almost certainly need to handle the return value indicating “too many requests.”
Munki State-Checks
If you wanted to take this further, we could actually turn off OnDemand for these Munki items. Using an installcheck_script, we could query whether or not a given product was added for a given user, and that would change the state of the “Add Photoshop CC To My Panel” to installed, and thus the button in Munki would correspond to “Add or Remove this app from my account.”
Generally, what I suspect is that most users will probably never particularly want to remove a product entitlement from themselves, since it doesn’t actually correspond to what’s installed or not. So changing Munki to reflect state probably doesn’t accomplish too much.
No Way To Trigger Installs
The only major feature request I really wish existed was a way to trigger CCDA into installing a product entitlement. All we can do is add or remove the entitlements to user accounts, but we can’t actually install them for the user (through CCDA).
You couldbuild a Named license package through CCP and actually distribute that directly in your Munki repo, but then you’re essentially back to the same point you were before: you still need to add the entitlement to the user, you still need to package each release / new version of the product, and you still need close to 60 GB (or more!) to store all of the CC packages. About the only thing you’re doing differently compared to serialized licenses is that you don’t have to worry about the serialization package anymore.
You can trigger updates using Remote Update Manager, but that doesn’t provide a mechanism to “Install Photoshop from CCDA.” So no matter what we do, we still rely on the user to log in to CCDA and press the button.
Bandwidth vs. Network
Because this method relies on the user installing from CCDA, that means the Adobe software is being deployed from the Internet. That means internet bandwidth is used to install these, not local network bandwidth. For orgs with smaller internet pipes, this could be significant cost or time sinks.
As I mentioned above, if bandwidth is an issue, you could package up the named licenses with CCP and distribute them via Munki. That would allow you to use your local network bandwidth rather than internet pipes.
One of the perks of working at a huge enterprise tech company is that I get to play with expensive enterprise software. In a shining example of naive optimism, I walked into the doors of Facebook expecting relationships with great software vendors, who listen to feedback, work with companies to develop deployment methods, and do cool things to make it easy to use their software that I couldn’t even have imagined.
The horrible bitter truth is that enterprise vendors are just as terrible at large-scale deployment as educational software vendors, except they cost more and somehow listen less.
One such vendor here is Tableau, a data visualization and dashboard engine. The data scientists here love it, and many of its users tell me the software is great. It’s expensive software – $2000 a seat for the Professional version that connects to their Tableau Server product. I’ll trust them that the software does what they want and has many important features, but it’s not something I use personally. Since our users want it, however, we have to deploy it.
And that’s why I’m sad. Because Tableau doesn’t really make this easy.
Enough Editorializing
As of writing time, the version of Tableau Desktop we are deploying is 9.3.0.
We deploy Tableau Desktop to connect with Tableau Server. I’ve been told by other users that using Tableau Desktop without Server is much simpler, as users merely have to put in the license number and It Just Works™. This blog post will talk about the methods we use of deploying and licensing the Tableau Desktop software for Professional use with Server.
Installing Tableau
The Tableau Desktop installer itself can be publicly downloaded (and AutoPkgrecipes exist). It’s a simple drag-and-drop app, which is easy to do.
If you are using Tableau Desktop with Tableau Server, the versions are important. The client and server versions must be in lockstep. Although I’m not on the team that maintains the Tableau Servers, the indication I get (and I could be wrong, so please correct me if so) is that backwards compatibility is problematic. Forward compatibility does not work – Tableau Desktop 9.1.8, for example, can’t be used with Tableau Server 9.3.0.
When a new version of Tableau comes out, we have to upgrade the server clusters, and then upgrade the clients. Until all the servers are upgraded, we often require two separate versions of Tableau to be maintained on clients simultaneously.
Our most recent upgrade of Tableau 9.1.8 to 9.3.0 involved this exact upgrade process. Since it’s just a drag-and-drop app, we move the default install location of Tableau into a subfolder in Applications. Rather than:
This allows easier use of simultaneous applications, and doesn’t pose any problem.
As we use Munki to deploy Tableau, it’s easy to install the Tableau dependencies / drivers, for connecting to different types of data sources, with the update_for relationship for things like the PostgresSQL libraries, SimbaSQL server ODBC drivers, Oracle Libraries, Vertica drivers, etc. Most of these come in simple package format, and are therefore easy to install. We have not noticed any problems running higher versions of the drivers with lower versions of the software – i.e. the latest Oracle Library package for 9.3 works with Tableau 9.1.8.
Since most of these packages are Oracle related, you get the usual crap that you’d expect. For example, the Oracle MySQL ODBC driver is hilariously broken. It does not work. At all. The package itself is broken. It installs a payload in one location, and then runs a postinstall script that assumes the files were installed somewhere else. It will never succeed. The package is literally the same contents as the tar file, except packaged into /usr/local/bin/. It’s a complete train wreck, and it’s pretty par for what you’d expect from Oracle these days.
Licensing Tableau
Tableau’s licensing involves two things: a local-only install of FLEXnet Licensing Agent, and the License Number, which can be activated via the command line. Nearly all of the work for licensing Tableau can be scripted, which is the good part.
The first thing that needs to happen is the installation of the FLEXnet Licensing package, which is contained inside Tableau.app:
To license the software using your license number: /Applications/Tableau9.3/Tableau.app/Contents/Frameworks/FlexNet/custactutil -activate XXXX-XXXX-XXXX-XXXX-XXXX
The Struggle is Real
I want to provide some context as to the issues with Tableau licensing.
Tableau licensing depends on the FLEXnet Licensing Agent to store its licensing data, which it then validates with Tableau directly. It does not have a heartbeat check, which means it does not validate that it is still licensed after its initial licensing. When you license it, it uses up one of your counts of seats that you’ve purchased from Tableau.
The main problem, though, is that Tableau generates a computer-specific hash to store your license against. So your license is tied to a specific machine, but that hash is not readable nor reproducible against any hardware-specific value that humans can use. In other words, even though you have a unique hash for each license, there’s no easy way to tell which computer that hash actually represents. There’s no tie to the serial number, MAC address, system UUID, etc.
Uninstalling Tableau / Recovering Licenses
The second problem, related to the first, is that the onlyway to get your license back is to use the -return flag:
What happens to a machine that uses up a Tableau license and then gets hit by a meteor? It’s still using that license. Forever. Until you tell Tableau to release your license, it’s being used up. For $2000.
So what happens if a user installs Tableau, registers it, and then their laptop explodes? Well, the Tableau licensing team has no way to match that license to a specific laptop. All they see is a license hash being used up, and no identifiable information. $2000.
This makes it incredibly difficult to figure out which licenses actually are in use, and which are phantoms that are gone. Since the license is there forever until you remove it, this makes keeping track of who has what a Herculean task. It also means you are potentially paying for licenses that are not being used, and it’s nearly impossible to figure out who is real and who isn’t.
One way to mitigate this issue is to provide some identifying information in the Registration form that is submitted the first time Tableau is launched.
Registering Tableau
With the software installed and licensed, there’s one more step. When a user first launches Tableau, they are asked to register the software and fill out the usual fields:
This is an irritating unskippable step, BUT there is a way to save some time here.
The registration data is stored in a plist in the user’s Preferences folder: ~/Library/Preferences/com.tableau.Registration.plist
The required fields can be easily pre-filled out by creating this plist by prepending the field name with “Data”, as in these keys:
If those keys are pre-filled before launching Tableau, the fields are pre-filled out when you launch Tableau.
This saves some time for the user to avoid filling out the forms. All the user has to do is hit the “Register” button.
Once Registration has succeeded, Tableau writes a few more keys to this plist – all of which are hashed and unpredictable.
The Cool Part
In order to help solve the licensing problem mentioned before, we can put some identifying information into the registration fields. We can easily hijack, say, the “company” field as it’s pretty obvious what company these belong to. What if we put the username AND serial number in there?
Now we have a match-up of a license hash to its registration data, and that registration data gives us something useful – the user that registered it, and which machine they installed on. Thus, as long as we have useful inventory data, we can easily match up whether or not a license is still in use if someone’s machine is reported lost/stolen/damaged, etc.
The Post-Install Script
We can do all of this, and the licensing, in a Munki postinstall_script for Tableau itself:
This file contains bidirectional Unicode text that may be interpreted or compiled differently than what appears below. To review, open the file in an editor that reveals hidden Unicode characters. Learn more about bidirectional Unicode characters
The better news is that as of Tableau 9.3, by our request, there’s now a way to pre-register the user so they don’t have to do anything here and never see this screen (and thus never have an opportunity to change these fields, and remove or alter the identifying information we’ve pre-populated).
Registration can be done by passing the -register flag to the main binary:
There are some caveats here, though. This is not a silent register. It must be done from a logged-in user, and it must be done in the user context. It can’t be done by root, which means it can’t be done by Munki’s postinstall_script. It doesn’t really help much at all, sadly. Triggering this command actually launches Tableau briefly (it makes a call to open and copies something to the clipboard). It does pretty much everything we don’t want silent flags to do.
It can be done with a LaunchAgent, though, which runs completely in the user’s context.
Here’s the outline of what we need to accomplish:
Tableau must be installed (obviously)
The Registration plist should be filled out
A script that calls the -register switch
A LaunchAgent that runs that script
Something to install the Launch Agent, and then load it in the current logged-in user context
Clean up the LaunchAgent once successfully registered
The Registration Script, and LaunchAgent
The registration script and associated LaunchAgent are relatively easy to do.
The registration script in Python:
This file contains bidirectional Unicode text that may be interpreted or compiled differently than what appears below. To review, open the file in an editor that reveals hidden Unicode characters. Learn more about bidirectional Unicode characters
Assuming we place this script in, let’s say, /usr/local/libexec/tableau_register.py, here’s a LaunchAgent you could use to invoke it:
This file contains bidirectional Unicode text that may be interpreted or compiled differently than what appears below. To review, open the file in an editor that reveals hidden Unicode characters. Learn more about bidirectional Unicode characters
The LaunchAgent obviously goes in /Library/LaunchAgents/com.facebook.tableauregister.plist.
If you’re playing along at home, be sure to test the registration script itself, and then the associated LaunchAgent.
Loading the LaunchAgent as the logged in user
With the registration script and associated LaunchAgent ready to go, we now need to make sure it gets installed and loaded as the user.
Installing the two files is easy, we can simply package those up:
This file contains bidirectional Unicode text that may be interpreted or compiled differently than what appears below. To review, open the file in an editor that reveals hidden Unicode characters. Learn more about bidirectional Unicode characters
Import the tableau_register.pkg into Munki and mark it as an update_for for Tableau.
Now comes the careful question of how we load this for the logged in user. Thanks to the wonderful people of the Macadmins Slack, I learned about launchctl bootstrap (which exists in 10.10+ only). bootstrap allows you to load a launchd item in the context you specify – including the GUI user.
Our postinstall script needs to:
Determine the UID of the logged in user
Run launchctl bootstrap in the context of that user
Wait for Tableau to register (which can take up to ~15 seconds)
Verify Tableau has registered by looking at the plist
Unload the LaunchAgent (if possible)
Remove the LaunchAgent
Something like this should do:
This file contains bidirectional Unicode text that may be interpreted or compiled differently than what appears below. To review, open the file in an editor that reveals hidden Unicode characters. Learn more about bidirectional Unicode characters
Note that launchctl bootout only exists on 10.11, not 10.10. For Mavericks users, simply deleting the LaunchAgent will have to suffice. There’s no huge risk here, as it will disappear the next time the user logs out / reboots.
This process does make certain assumptions, though. For one thing, it assumes that there’s only one user who cares about Tableau. Generally speaking, it’s uncommon for us that multiple users will sign into the same machine, much less have multiple users with different software needs on the same machine, so that’s not really a worry for me.
Tableau themselves make this assumption. If one user installs and registers Tableau, it’s registered and installed for all user accounts on that machine. Whoever gets there first “wins.” Tableau considers this a “device” license, thankfully, not a per-user license. In a lab environment where devices aren’t attached to particular users, this may be a win because the admin need only register it to their own department / administrative account / whatever.
Another simple assumption made here is that the user’s home directory is in /Users. I did this for simplicity in the script, but if this isn’t true in your environment, you’ll need to either hard-code the usual path for your clients’ home directories in, or find a way to determine it at runtime.
Lastly, this all assumes this is happening while a user is logged in. This works out okay if you make Tableau an optional install only, which means users have to intentionally click it in Managed Software Center in order to install. If you plan to make Tableau a managedinstall in Munki, you’ll need to add some extra code to make sure this doesn’t happen while there’s no user logged in. If that’s the case, you might want to consider moving some of the postinstall script for Tableau into the registration script invoked by the LaunchAgent.
Putting It Together
The overall process will go like this:
Install Tableau Desktop 9.3.
Postinstall action for Tableau Desktop 9.3: pre-populate the Registration plist, install FLEXnet, and license Tableau.
Update for Tableau Desktop 9.3: install all associated Tableau drivers.
Update for Tableau Desktop 9.3: install the LaunchAgent and registration script.
Postintall action for Tableau Registration: use launchctl bootstrap to load the LaunchAgent into the logged-in user’s context.
Loading the LaunchAgent triggers Tableau to pre-register the contents of the Registration plist.
Unload / remove the LaunchAgent.
Thus, when the user launches Tableau for the first time, it’s licensed and registered. Tableau now has a match between the license hash and a specific user / machine for easy accounting later, and the user has nothing in between installing and productivity.
What A Load of Crap
It’s frankly bananas that we have to do this.
I understand software development is hard, and enterprise software is hard, but for $2000 a copy, I kind of expect some sort of common sense when it comes to mass deployment and licensing.
Licensing that gets lost unless you uninstall it? No obvious human-readable match-up between hardware and the license number generated by hashing? Charging us year after year for licenses we can’t easily tell are being used, because there’s no heartbeat check in their implementation of FLEXNet?
Why do I have to write a script to license this software myself? Why do I have to write a separate script and a LaunchAgent to run it, because your attempt at silent registration was only ever tested in one single environment, where a logged in user manually types it into the Terminal?
Nothing about this makes sense, from a deployment perspective. It’s “silent” in the sense that I’ve worked around all the parts of it that aren’t silent and automated, by fixing the major gaps in Tableau’s implementation of automated licensing. That still doesn’t fix the problem of matching up license counts to reality, for those who installed Tableau before we implemented the registration process. Tableau has been of no help trying to resolve these issues, and why would they? We pay them The Big Bucks™ for these licenses we may not be using. We used them at one point, though, so pay up!
This is sadly par for the course for the big enterprise software companies, who don’t seem to care that much about how hard they make it for admins. Users love the products and demand it, and therefore management coughs up the money, and that means us admins who have to spend the considerable time and energy figuring out how to make that happen are the ones who have to suffer. And nobody particularly cares.
They all serve the same basic goal – run AutoPkg with a selection of recipes, and trigger some sort of notification / email / alert when an import succeeds, and when a recipe fails. This way, admins can know when something important has happened and make any appropriate changes to their deployment mechanism to incorporate new software.
Everything Goes In Git
Facebook is, unsurprisingly, big on software development. As such, Facebook has a strong need for source control in all things, so that code and changes can always be identified, reviewed, tested, and if necessary, reverted. Source control is an extremely powerful tool for managing differential changes among flat text files – which is essentially what AutoPkg is.
Munki also benefits strongly, as all of Munki configuration is based solely on flat XML-based files. Pkginfo files, catalogs, and manifests all benefit from source control, as any changes made to the Munki repo will involve differential changes in (typically) small batches of lines relative to the overall sizes of the catalogs. Obvious note: binaries packages / files have a more awkward relationship with git and source control in general. Although it’s out of the scope of this blog post, I recommend reading up on Allister Banks’ article on git-fat on AFP548 and how to incorporate large binary files into a git repo.
Git + Munki
At Facebook, the entire Munki repo exists in git. When modifications are made or new packages are imported, someone on the Client Platform Engineering team makes the changes, and then puts up a differential commit for team review. Another member of the team must then review the changes, and approve. This way, nothing gets into the Munki repo that at least two people haven’t looked at. Since it’s all based on git, merging changes from separate engineers is relatively straightforward, and issuing reverts on individual packages can be done in a flash.
AutoPkg + Munki
AutoPkg itself already has a great relationship with git – generally all recipes are repos on GitHub, most within the AutoPkg GitHub organization, and adding a new repo generally amounts to a git clone.
My initial attempts to incorporate AutoPkg repos into a separate git repo were a bit awkward. “Git repo within a git repo” is a rather nasty rabbit hole to go down, and once you get into git submodules you can see the fabric of reality tearing and the nightmares at the edge of existence beginning to leak in. Although submodules are a really neat tactic, regulating the updating of a git repo within a git repo and successfully keeping this going on several end point machines quickly became too much work for too little benefit.
We really want to make sure that AutoPkg recipes we’re running are being properly source controlled. We need to be 100% certain that when we run a recipe, we know exactly what URL it’s pulling packages from and what’s happening to that package before it gets into our repo. We need to be able to track changes in recipes so that we can be alerted if a URL changes, or if more files are suddenly copied in, or any other unexpected developments occur. This step is easily done by rsyncing the various recipe repos into git, but this has the obvious downside of adding a ton of stuff to the repo that we may not ever use.
The Goal
The size and shape of the problem is clear:
We want to put only recipes that we care about into our repo.
We want to automate the updating of the recipes we care about.
We want code review for changes to the Munki repo, so each package should be a separate git commit.
We want to be alerted when an AutoPkg recipe successfully imports something into Munki.
We want to be alerted if a recipe fails for any reason (typically due to a bad URL).
We really don’t want to do any of this by hand.
autopkg_runner.py
Facebook’s Client Platform Engineering team has authored a Python script that performs these tasks: autopkg_runner.py.
The Setup
In order to make use of this script, AutoPkg needs to be configured slightly differently than usual.
The RECIPE_REPO_DIR key should be the path to where all the AutoPkg git repos are stored (when added via autopkg add).
The RECIPE_SEARCH_DIRS preference key should be reconfigured. Normally, it’s an array of all the git repos that are added with autopkg add (in addition to other built-in search paths). In this context, the RECIPE_SEARCH_DIRS key is going to be used to contain only two items – ‘.’ (the local directory), and a path to a directory inside your git repo that all recipes will be copied to (with rsync, specifically). As described earlier, this allows any changes in recipes to be incorporated into git differentials and put up for code review.
Although not necessary for operation, I also recommend that RECIPE_OVERRIDE_DIRS be inside a git repo as well, so that overrides can also be tracked with source control.
The entire Munki repo should also be within a git repo, obviously, in order to make use of source control for managing Munki imports.
Notifications
In the public form of this script, the create_task() function is empty. This can be populated with any kind of notification system you want – such as sending an email, generating an OS X notification to Notification Center (such as Terminal Notifier or Yo), filing a ticket with your ticketing / helpdesk system, etc.
If run as is, no notifications of any kind will be generated. You’ll have to write some code to perform this task (or track me down in Slack or at a conference and badger me into doing it).
What It Does
The script has a list of recipes to execute inside (at line 33). These recipes are parsed for a list of parents, and all parent recipes necessary for executing these are then copied into the RECIPE_REPO_DIR from the AutoPkg preferences plist. This section is where you’ll want to put in the recipes that you want to run.
Each recipe in the list is then run in sequence, and catalogs are made each time. This allows each recipe to create a full working git commit that can be added to the Munki git repo without requiring any other intervention (obviously into a testing catalog only, unless you shout “YOLO” first).
Each recipe saves a report plist. This plist is parsed after each autopkg run to determine if any Munki imports were made, or if any recipes failed. The function create_task() is called to send the actual notification.
If any Munki imports were made, the script will automatically change directory to the Munki repo, and create a git feature branch for that update – named after the item and the version that was imported. The changes that were made (the package, the pkginfo, and the changes to the catalogs) are put into a git commit. Finally, the current branch is switched back to the Master branch, so that each commit is standalone and not dependent on other commits to land in sequence. NOTE: the commits are NOT automatically pushed to git. Manual intervention is still necessary to push the commit to a git repo, as Facebook has a different internal workflow for doing this. An enterprising Python coder could easily add that functionality in, if so desired.
Execution & Automation
At this point, executing the script is simple. However, in most contexts, some automation may be desired. A straightforward launch daemon to run this script nightly could be used:
This file contains bidirectional Unicode text that may be interpreted or compiled differently than what appears below. To review, open the file in an editor that reveals hidden Unicode characters. Learn more about bidirectional Unicode characters
Automation is great, and I’m a big fan of it. However, with any automated system, it’s important to fully understand the implications of each workflow.
With this particular workflow, there’s a specific issue that might arise based on timing. Since each item imported into Munki via AutoPkg is a separate feature branch, that means that the catalog technically hasn’t changed when you run the .munki recipe against the Master branch. If you run this recipe twice in a row, AutoPkg will try to re-import the packages again, because the Master branch hasn’t incorporated your changes yet.
In other words, you probably won’t want to run this script until your git commits are pushed into Master. This could be a potential timing issue if you are running this script on a constant time schedule and don’t get an opportunity to push the changes into master before the next iteration.
I Feel Powerful Today, Give Me More
If you are seeking even more automation (and feel up to doing some Python), you could add in a git push to make these changes happen right away. If you are only adding in items to a testing catalog with limited and known distribution, this may be reasonably safe way to keep track of all Munki changes in source control without requiring human intervention.
Such a change would be easy to implement, since there’s already a helper function to run git commands – git_run(). Here’s some sample code that could incorporate a git push, which involves making some minor changes to the end of create_commit():
This file contains bidirectional Unicode text that may be interpreted or compiled differently than what appears below. To review, open the file in an editor that reveals hidden Unicode characters. Learn more about bidirectional Unicode characters
Ultimately, the goal here is to remove manual work from a repetitive process, without giving up any control or the ability to isolate changes. Incorporating Munki and AutoPkg into source control is a very strong way of adding safety, sanity, and accountability to the Mac infrastructure. Although this blog post bases it entirely around git, you could accommodate a similar workflow to Mercurial, SVN, etc.
The full take-away from this is to be mindful of the state of your data at all times. With source control, it’s easier to manage multiple people working on your repo, and it’s (relatively) easy to fix a mistake before it becomes a catastrophe. Source control has the added benefit of acting as an ersatz backup of sorts, where it becomes much easier to reconstitute your repo in case of disaster because you now have a record for what the state of the repo was at any given point in its history.
Well, Adobe has updated the CC products to 2015 versions. That means another day spent dedicated to downloading and building packages via CCP.
In my previous blog post about Adobe CC, I covered how to mass-import them into Munki while still addressing the nasty uninstaller bug.
The Uninstaller Bug
As described in the previous post (linked above), the problem with device-based licensing for Adobe is that the uninstallers are very aggressive. Uninstalling a single device-based package will nuke the licensing for all other Adobe software that is licensed with that same serial number. In other words, if you install Photoshop CC and Dreamweaver CC, and uninstall Dreamweaver CC, Photoshop CC will complain that it is not licensed and needs to be fixed (and thus won’t run).
That’s irritating.
To address this, one solution is to use the Serial number installer package with the Named License uninstaller package. The Named License uninstaller will not nuke the entire license database on that machine. This allows us to successfully install and uninstall without affecting other Adobe products on the machine.
Note: There are other issues with this approach if you do not have unlimited licensing agreements (ETLA), please see the previous blog post for details.
The simplest way to handle this is to create two folders – “CC Packages” and “CC NoSerial Packages”. Use CCP to create Serial Number licensing packages in the “CC Packages” folder for all new CC 2015 products. Then create a Named license package for the same product in the “CC NoSerial Packages.”
IMPORTANT NOTE about Munki: The import script will use filenames as item names. You may wish to either create your CCP packages with “2015” as a suffix to differentiate it from the previous versions, or adjust the names in the pkginfo files manually, or adjust your manifests to include the appropriate new item names. Also, you may need to adjust icon names. You probably don’t want to reuse the same item name for CC 2015 products as CC 2014 products, otherwise Munki may try to install Adobe updates imported via aamporter on versions that are too high.
Importing The Packages Into Munki
Now that you have two copies of each product in separate folders, we can combine the right parts to allow easy importing into Munki.
Copy the Uninstaller packages from the “CC NoSerial Packages” folder for each product into the equivalent “CC Packages” product folder.
End result is that the “CC Packages” folder will now contain each of the separate CCP products, each of which will contain a “Build” folder with the Serial Number license installer, and a Named license uninstaller.
Now you can run the script on your “CC Packages” folder: ./munkiimport_cc_installers.py CC\ Packages
The script will create the appropriate install and uninstall DMGs, and pkginfos for all of these products. Don’t forget to run makecatalogs afterwards.
In my initial testing, none of the CC 2015 apps produced any errors or problems installing or uninstalling via Munki.
Adobe Creative Cloud is one of those things that admins just can’t escape. Sooner or later some creative or smart person at any given organization is going to stop and think, “Wow, I could really go for some Photoshop right about now,” and then there’s budget THIS and committee THAT and one way or another, you, the admin, end up with 20 GB of Adobe products sitting in your lap and a request to give everyone exactly what they want.
Then of course you discover that Adobe isn’t very good at packaging, and that they expect you actually do all the work yourself. Of course they’ll provide you the basic tool – Creative Cloud Packager – to download and create these packages for you. But it’s still on you to get those all ready.
That’s kind of annoying.
I recently went through this process and boy do I have annoyance enough to share with the whole class. Since I suffered through this, I wish to hopefully make it easier for future generations to deploy Adobe CC using Munki without having to reinvent the wheel completely.
First and foremost, read this page I wrote on the Munki wiki. It describes the process of importing CCP packages into Munki, along with importing updates using Timothy Sutton’s aamporter.
Missing from this wiki page, however, are two things that may be of use to Munki admins: icons, and descriptions.
Icons
Getting icons for 25 different Adobe applications is a royal pain. Independently opening up each app bundle and searching through Contents/Resources/ for the right .icns file is not fun, because, well, there are a lot of them.
I got tired of doing that after the first one, so I tried to figure out a way I could speed up the process.
I simplified the extraction process using an ugly find: find /Applications/Adobe\ Dreamweaver\ CC\ 2014.1/*.app/Contents/Resources -name "*.icns" -execdir sips -s format png '{}' --out ~/Desktop/$(basename '{}').png \;
That copies all of the .icns files out from inside the Dreamweaver app bundle onto my Desktop, converting them to png format using sips. I still needed to manually sort through all the icons to figure out which one corresponded to the .app bundle’s actual icon.
Being Adobe, they’re not all named consistently, so I can’t just look for the same filename in each application. Some of them are named the same (commonly “appIcon.icns”), so I also can’t extract each of the different applications’ icons into the same folder, because then I’d overwrite some of them.
I realized, ultimately, there was no pretty way to do this.
Instead, I dutifully recorded all the icon names for each Adobe CC application, and wrote a script that would use sips to copy them out into PNG format to a folder of my choice (such as the icons directory of my Munki repo).
This file contains bidirectional Unicode text that may be interpreted or compiled differently than what appears below. To review, open the file in an editor that reveals hidden Unicode characters. Learn more about bidirectional Unicode characters
The script will check for the existence of each of the Adobe CC products that can be packaged with Creative Cloud Packager (as of writing time), and then pull out the icon if it’s present.
That made it a bit easier for me to give all of my separate Adobe CC apps in Munki nice shiny icons.
The two exceptions are Adobe Exchange Panel CS6, and Gaming SDK. Neither of them install an app with an icon contained inside as their primary executable, so I had to manually download logos from Adobe’s website.
Descriptions
Sadly, descriptions are a bit more work to come by. The best I’ve found so far is from this page on Adobe’s website. I simply copied and pasted those blurbs into my pkginfos.
Update:Pepijn Bruienne brought to my attention that MacUpdate.com also makes a great source of descriptions, that are generally more verbose than the blurbs on the Adobe site I mentioned above.
Adobe Acrobat allows users to communicate and collaborate more effectively and securely. Unify a wide range of content in a single organized PDF Portfolio. Collaborate through electronic document reviews. Create and manage dynamic forms. And help protect sensitive information.
The goal here is to be able to deploy a new computer with Chef and Munki preinstalled via DeployStudio (which runs over HTTPS), and then bootstrap Munki using SSL client certificates – meaning every part of the network deployment process is over a secure channel.
Strap in, because this one’s going to be complicated.
Set the HostName, LocalHostName, and ComputerName.
Perform the initial Chef-client run using recipe [x509::munki2_client] to generate the CSR.
LaunchDaemon that waits for the existence of /etc/ssl/munki2.sacredsf.org.csr triggers:
It will keep running the [x509::munki2_client] recipe while the CSR exists.
The CSR will only be deleted when the CSR is signed on the Chef server.
When the recipe succeeds and the CSR is removed and the .crt file is created, run the [munkiSSL::munki] recipe to copy the certificates into /Library/Managed Installs/certs/.
Touch the Munki bootstrap file.
With the certificates in place, Munki ManagedInstalls profile installed, and the bootstrap trigger file present, Munki can now successfully bootstrap.
The Detailed Process:
Preparing the Deployment:
For my deployments, I like using Greg Neagle’s CreateOSXInstallPkg (henceforth referred to by acronym “COSXIP”) for generating OS X installer packages. Rather than crafting a specific image to be restored using DeployStudio, a package can be used to both install a new OS as well as upgrade-in-place over an existing OS.
One of the perks of using COSXIP is being able to load up additional packages that are installed at the same time as the OS, in the OS X Installer environment.
As mentioned above, we’re going to use a number of specific packages. Here’s what the COSXIP plist looks like:
This file contains bidirectional Unicode text that may be interpreted or compiled differently than what appears below. To review, open the file in an editor that reveals hidden Unicode characters. Learn more about bidirectional Unicode characters
Note that I’ve added “Dist” to the names of them. Due to a Yosemite requirement that all included packages be distribution packages, I have forcefully converted each package to a distribution using productbuild as described in the above link, and added “Dist” to the end to distinguish them.
The Packages:
AddChefToHosts and AddMunkiToHosts are payload-free packages that just add the IP addresses for my Chef and Munki2 server to /etc/hosts, since this is just in testing and those services don’t yet exist in DNS. The scripts look like this:
chef-12.1.0-1.Dist is a specially repackaged-version of the Chef client. You can find the recipe for this in my AutoPkg repo.
The reason I did this is because the Chef-client’s postinstall script assumes that the target volume is a live booted OS X install – which is not true of the OS X install environment. The OS X install environment doesn’t have all OS X features, and the Chef client postinstall script will fail to do certain things like run basename and uname, and the symlinks will not work properly as they are executed in the OS install environment. My AutoPkg recipe addresses these issues and repackages the Chef client in a manner that is more compatible with the OS X install environment.
ChefSetup installs the client.rb and validation.pem files into /etc/chef/. The client.rb file looks like this:
This file contains bidirectional Unicode text that may be interpreted or compiled differently than what appears below. To review, open the file in an editor that reveals hidden Unicode characters. Learn more about bidirectional Unicode characters
The validation.pem file is the private key of the organization. See this blog post for details.
ClearRegistration, CreateAdmin, Profile-SetupAssistant are packages that bypass the OS X first-time boot setup process, by skipping the device registration, creating a local Admin account, and then skipping the iCloud Setup Assistant on first login. This allows me to boot straight to the Login Window and then login straight to the Desktop with no interruption.
Outset is the distribution package of Joseph Chilcote’s Outset, a fantastic tool for easily running scripts and packages at boot time and login time (which is easier than writing a new launch agent or launch daemon every time).
Outset-ChefClient installs the initial Chef setup script into /usr/local/outset/firstboot-scripts/. This initial Chef setup script looks like this:
This file contains bidirectional Unicode text that may be interpreted or compiled differently than what appears below. To review, open the file in an editor that reveals hidden Unicode characters. Learn more about bidirectional Unicode characters
The script sets the hostname to the serial number (which I’m just using in my test environment so I can boot multiple VMs without having all of them be named “Mac.local”), and then runs the Chef client to trigger the generation of the CSR.
XCodeCLITools installs the Xcode Command Line tools from the Developer site. This isn’t strictly necessary, but if you run Chef-client manually it will prompt you to install them, so preinstalling saves me some testing time.
ChefCSRTrigger installs the Launch Daemon that watches the path /etc/ssl/munki2.sacredsf.org.csr. So long as that path exists, this Launch Daemon will continue to trigger. The CSR is generated by the first run of the Outset Chef script, and this will keep making a request until the CA signs the CSR. The Launch Daemon looks like this:
This file contains bidirectional Unicode text that may be interpreted or compiled differently than what appears below. To review, open the file in an editor that reveals hidden Unicode characters. Learn more about bidirectional Unicode characters
This file contains bidirectional Unicode text that may be interpreted or compiled differently than what appears below. To review, open the file in an editor that reveals hidden Unicode characters. Learn more about bidirectional Unicode characters
Once the CSR is found, the script will attempt to run the same recipe again. If the recipe succeeds, the CSR will disappear and instead, /etc/ssl/munki2.sacredsf.org.crt will appear. If this file exists after the Chef-client run, the script will proceed to try and run the [munkiSSL::munki] recipe until it has successfully copied over the cert into /Library/Managed Installs/certs/clientcert.pem (which should theoretically only take one run). Then, it will create the Munki bootstrap file.
With all of these packages, you can build your OS X installer to use in DeployStudio: sudo ./createOSXinstallPkg --plist=InstallYosemite-ChefMunki.plist
Deployment:
When a computer is NetBooted into DeployStudio, and the OS is installed (along with all the packages above), that’s when the fun stuff happens.
On first boot, Outset will execute the run_chef.sh script (installed by the Outset-ChefClient package). This script will wait for network access, and then use scutil to set the HostName, LocalHostName, and ComputerName to the serial number. Then, it will run execute the first Chef client run with the [x509::munki2_client] recipe, which generates a private key and submits a CSR to the Chef server.
The creation of the CSR file at /etc/ssl/munki2.sacredsf.org.csr triggers the execution of the org.sacredsf.chef.csrtrigger LaunchDaemon (installed by the ChefCSRTrigger package), which will continually run the chef_munki_cert.sh script while that CSR file is present.
On the Chef server/workstation, the CSR needs to be signed (this is assuming the ChefCA is set up according to previous blog posts): chef-ssl autosign --ca-name="ChefCA" --ca-path=/home/nmcspadden/chefCA
When the CSR is signed, the LaunchDaemon that is spinning in circles around the CSR file will finally have a successful chef-client run. The successful run will delete the csr file and create the signed certificate file at /etc/ssl/munki2.sacredsf.org.crt.
Once this file exists, the script will then trigger the [munkiSSL::munki] recipe, which copies the certificates and private keys from /etc/ssl/ into /Library/Managed Installs/certs/ with the appropriate names.
Finally, the Munki bootstrap file is created at /Users/Shared/.com.googlecode.munki.checkandinstallatstartup.
The appearance of the Bootstrap file will cause Munki to execute immediately (as we’re still at the Login Window at this point). Munki will read the preferences from the ManagedInstalls profile settings, which tells it to use the certificates in /Library/Managed Installs/certs/ to check the server https://munki2.sacredsf.org/repo for updates.
If the certificates are valid, Munki will proceed with a normal bootstrap run, except through a secure SSL connection that uses its client certificates to communicate with the Munki server, which has been configured to require these certificates (see the previous blog posts).
Conclusion
It’s now possible to securely bootstrap a new OS X machine using Chef to set up SSL client certificates to use with Munki. The best part is that it doesn’t require hands-on attention on the OS X client. The downside is that, at this point, it does require hands-on attention on the Chef server, where the CA is.
There are some possible easy fixes for that, though. The easiest solution would be to run a cronjob on the Chef server that automatically signs all CSRs every X amount of time, which would eliminate any need for manual intervention on the Chef CA. That’s not a desirable method, though, because that’s essentially letting any client who runs the right recipe get a free SSL certificate to the Munki repo. There’s no verification that the client is one we want to allow.
Another possibility to use a more industrial-strength internal CA not managed by Chef, which can have its own policies and methods for signing certificates. This is more common in enterprise environments where they tend to have their own root CAs and Intermediary CAs for internal-only services. More commercial offerings of this sort of thing probably have better methods for determining which CSRs get signed and which don’t.
The chef-ssl client can also be used to generate CSRs for third-party external CAs, but you probably wouldn’t want to sign individual clients with an external CA.
At least we can bootstrap a large batch of machines at once. With 30 machines running, they’ll all submit CSRs and sit there waiting until they get signed. In one command on the CA server, you can sign all 30 CSRs and they’ll automatically proceed to the next step, which is to get the certs and then bootstrap Munki. So we’re at mostly unattended install. But hey, as a proof of concept, it works!
There are many ways to set up Munki, since it’s just a webserver. The Demonstration Setup is a great way to get started, but doesn’t list the steps for setting up OS X Server. A lot of new Munki admins (or generally new Munki admins) may have an OS X Server they have access to, but not other web servers, so a guide to getting started with the latest version of OS X Server (as of writing time, that’s Server 4, on Mac OS 10.10.2 Yosemite) may be helpful.
This is all assuming you’ve got Server.app set up and running.
If the Websites service in Server.app is running, turn it off first.
The first steps are to create the Munki repo in the location that Server 4 uses to store website data: mkdir /Library/Server/Web/Data/Sites/Default/repo mkdir /Library/Server/Web/Data/Sites/Default/repo/catalogs mkdir /Library/Server/Web/Data/Sites/Default/repo/pkgs mkdir /Library/Server/Web/Data/Sites/Default/repo/pkgsinfo mkdir /Library/Server/Web/Data/Sites/Default/repo/manifests
Change permissions to make sure it’s accessible: chmod -R a+rX /Library/Server/Web/Data/Sites/Default/repo
In the Server.app Websites pane, edit the “Server Website” (port 80) settings:
Next to “Redirects”, click “Edit…”, and remove the only redirect (which automatically redirects port 80 to port 443 traffic). It should look like this:
Next, click “Edit Advanced Settings” and check the box for “Allow folder listing” (just for now – it’s easier to visually test this way):
If you are testing this on the OS X Server itself (i.e. you are only using one machine total), do this: sudo defaults write /Library/Preferences/ManagedInstalls SoftwareRepoURL "http://localhost/repo" sudo defaults write /Library/Preferences/ManagedInstalls ClientIdentifier "test_munki_client"
If you are testing Munki on a different client machine from the server, do this: sudo defaults write /Library/Preferences/ManagedInstalls SoftwareRepoURL "http://ip_or_domain_name_of_server/repo" sudo defaults write /Library/Preferences/ManagedInstalls ClientIdentifier "test_munki_client"
And then finally you can check to see if Munki behaves as you’d expect: sudo /usr/local/munki/managedsoftwareupdate -vv
Time to take it a step farther: doing a full Munki bootstrap deployment using Puppet’s client certificates.
The goal of the Munki bootstrap is to make it easy to set up and deploy a new computer simply by installing Munki on it and applying the bootstrap file. This process is easy and straightforward, and is the cornerstone of my deployment.
But now that we can introduce Munki with SSL client certificates, we can also guarantee secure delivery of all of our content over an authenticated SSL connection. Since Puppet is providing the certificates for both the server and client, we need to install Puppet on the client to allow Munki to use it for verification.
The General Idea:
If we’re going to bootstrap a machine with Puppet, I could just install Puppet and let it do all the work to install Munki. However, this puts a heavy burden on the Puppet master. While embracing Puppet for client configuration is certainly a possibility, I’m not at the point where I think Puppet is the best solution for OS X management, and I don’t want to turn my small Puppetmaster Docker container into the definitive source for Munki for my entire fleet.
In other words, I don’t want to rely on using Puppet to install Munki, because I don’t want to turn my Puppetmaster into a file server – it’s rather resource intensive to do so.
Instead, what I’d like to do is leverage the tools I already use – like DeployStudio and Munki – to do the work it does best, which is to install packages.
For my deployments, I like using Greg Neagle’s CreateOSXInstallPkg (henceforth referred to by acronym “COSXIP”) for generating OS X installer packages. Rather than crafting a specific image to be restored using DeployStudio, a package can be used to both install a new OS as well as upgrade-in-place over an existing OS.
One of the perks of using COSXIP is being able to load up additional packages that are installed at the same time as the OS, in the OS X Installer environment.
As mentioned above, we’re going to use a number of specific packages. Here’s what the COSXIP plist looks like:
This file contains bidirectional Unicode text that may be interpreted or compiled differently than what appears below. To review, open the file in an editor that reveals hidden Unicode characters. Learn more about bidirectional Unicode characters
Note that I’ve added “Dist” to the names of them. Due to a Yosemite requirement that all included packages be distribution packages, I have forcefully converted each package to a distribution using productbuild as described in the above link, and added “Dist” to the end to distinguish them.
The Packages:
create_admin-fl-Dist-1.9.pkg is a local admin account created with CreateUserPkg.
Puppet, Hiera, and Facter are all downloaded directly from Puppetlabs (or via Autopkg recipe).
The Facter-MacFactsDist.pkg package is one I created based on the Mac-Facts facts that Graham Gilbert wrote, linked above.
CSRAttributesCOSXIPDist.pkg is a package I created to add a customized csr_attributes.yaml file to the client, for use with my custom CSR autosigning policy).
OutsetDist.pkg is a distribution copy of the latest release of Outset. Outset is an easy way to run scripts on firstboot, subsequent boots, or user login.
OutsetPuppetAgentDist.pkg is where the magic happens. A script is placed into /usr/local/outset/firstboot-scripts/, which executes and then deletes itself. This script is what does all the hard work. I’ll talk about this script in detail in the next section. This package is also available in my Github repo.
munkitools-2.2.0.2399.pkg is the current (as of writing time) release version of Munki, available from Munkibuilds.
The OS X installer is then built: sudo ./createOSXinstallPkg --plist=InstallYosemite-PuppetMunki.plist
The resulting InstallYosemitePuppetMunki.pkg is copied to my DeployStudio repo.
Critical note for those following at home: if you do not have your Puppet server and Munki server available in DNS, you will need to add them to the clients’ /etc/hosts files. You can do so with a script like this:
The DeployStudio workflow is quite simple: erase the hard drive, install the “InstallYosemitePuppetMunki.pkg” to the empty “Macintosh HD” partition, automated, as a live install (not a postponed install).
Once the package is installed, the machine reboots automatically and begins the actual OS X installation process.
The First Boot:
The first boot triggers Outset, which delays the login window while it runs all the scripts in /usr/local/outset/firstboot-scripts/ (and then does other things, but those are not relevant for this blog post). I added a package above, OutsetPuppetAgentDist.pkg, which places a script into this folder for firstboot execution.
This file contains bidirectional Unicode text that may be interpreted or compiled differently than what appears below. To review, open the file in an editor that reveals hidden Unicode characters. Learn more about bidirectional Unicode characters
The goal of this script is to wait for the network to kick in, and then set the hostname to the serial number of the client, then trigger Puppet, followed by kickstarting the Munki bootstrap.
First, I borrowed a technique from Penn State University’s FirstBootScript to wait until network access is up. This is done with scutil, which waits up to 180 seconds for DNS to resolve before continuing. This ensures that all network services are up and running and the hostname can be successfully set.
Simple way to parse the serial number for the client.
When doing this in a virtual machine (like via VMWare Fusion, Parallels, or VirtualBox), sometimes you get weird things. VMWare Fusion, in particular, reaches into an ASCII grab bag to find characters for the serial number. It uses symbols like “+” and “/” in its serial number, and if I’m going to assign this to a hostname, Puppet is certainly going to complain about a hostname like “vmwpwg++jkig.sacredsf.org”. Better to avoid that completely by removing the special characters.
Once the hostnames are set with scutil, trigger a Puppet run. I use --waitforcert 60
to give Puppet time (up to 60 seconds) to send a CSR to the Puppetmaster, get it signed, and bring it back. I also store the output in /var/log/puppetagent.log so I can see the results of the Puppet run (although this was really only necessary for testing, and probably worth removing for production).
When Puppet runs, it also checks for any configurations that need to be applied, and executes them. As part of its configurations, Puppet will copy all the appropriate Puppet certificates into the /Library/Managed Installs/certs/ directory, so Munki can use them for SSL client certificates.
Finally, the script then creates the Munki bootstrap, which can now run correctly thanks to the profile installed above, and the client certificates that Puppet has created.
The Puppet Configuration:
I mentioned two paragraphs ago that Puppet applies some configurations. Right now, my Puppet usage is very light and simple:
Remove the ‘puppet’ user and groups, because I don’t need them.
For OS X clients, copy the Puppet certificates to /Library/Managed Installs/certs/ so Munki can use them.
This file contains bidirectional Unicode text that may be interpreted or compiled differently than what appears below. To review, open the file in an editor that reveals hidden Unicode characters. Learn more about bidirectional Unicode characters
The second part is done with munki_ssl module I wrote, which you can find on Github. The manifest:
This file contains bidirectional Unicode text that may be interpreted or compiled differently than what appears below. To review, open the file in an editor that reveals hidden Unicode characters. Learn more about bidirectional Unicode characters
Aggressively check to make sure that we’re only doing this on OS X, and then use Puppet’s file resources to copy the Puppet certs from /etc/puppet/ssl/ to the appropriate names in /Library/Managed Installs/certs/.
Munki Configuration:
Using generic names makes it easy to configure Munki’s SSL settings with a profile, mentioned above:
This file contains bidirectional Unicode text that may be interpreted or compiled differently than what appears below. To review, open the file in an editor that reveals hidden Unicode characters. Learn more about bidirectional Unicode characters
With this profile in place, Munki is configured to use SSL with client certificates – which are put into place by Puppet.
The last step of the script mentioned above is to kick off the Munki bootstrap, which can now run without problems.
Conclusions
It was a bit of a complicated process, but it’s a way to guarantee secure delivery of content from out-of-the-box provisioning all the way to the end point. Even if there were a rogue Munki server operating at http://munki/repo or https://munki/repo/, using a non-default server name (admittedly, “munki2” is not very creative) helps mitigate that risk. The use of client certificates prevent rogue Munki clients from pulling data from our Munki server. The use of SSL prevents a MITM attack, and DeployStudio is configured to use SSL connections as well.
We can generally rest easy knowing that we have secure provisioning of new devices (or refreshing of old devices), and secure delivery of Munki content to our end clients.
(Mandatory Docker reference: my Puppetmaster and Munki are both running in the Docker containers mentioned in the blog post at the top of this one)
Sal’s basic functionality is useful on its own, for the basic Munki reporting – what are the completed installs, pending updates, what OS versions, how many devices checked in the past 24 hours, etc. In this post, I’m going to demonstrate how to get more out of Sal.
Adding in Facter:
You can add much more, though, by the use of Puppet, and more specifically, the piece of Puppet called Facter. Facter is a separate program that works with Puppet that simply gathers information (“facts”) about the host OS and stores them (ostensibly so that Puppet can determine what the machine’s state is and what needs to happen to it to bring it in line with configured policy).
Note: if you’re an Autopkg user, you can find a Facter recipe in the official default repo: autopkg run Facter.download (or autopkg run Facter.munki if you have Munki configured with Autopkg).
Install Facter on your clients, either with Munki or by simply installing the Facter.pkg.
Test out Facter on that client by opening up the Terminal and running Facter: facter
You’ll see a whole lot of information about the client printed out. Handy!
Additional Facts:
A nice thing about Facter is that it’s easy to extend and customize with additional facts, which are essentially just Ruby scripts. Puppet Labs has documentation on Custom Facts here.
Graham Gilbert, the author of Sal, has also written some helpful custom facts for Macs, which I’m going to use here.
We’re going to need to get these facts downloaded and onto our clients. Use whatever packaging utility you like to do this, but all of those .rb files have to go into Facter’s custom facts directory. There are lots of places to put them, but I’m going to place them in /var/lib/puppet/lib/facter/, where they can also be used by Puppet in the future.
Once those facts are installed on your client, you can run Facter again and access them using an additional argument: sudo facter --puppet
Note that you now need sudo to see these extra facts. Facter needs administrative privileges to get access to those facts, so simply running facter --puppet will give you the same results we had previously (before the new Mac facts were installed). This won’t be a problem, as the Sal postflight script, when executed with Munki, is run as root.
To make use of Facter with Sal, we need only run Munki again, which executes the Sal postflight: sudo managedsoftwareupdate
When the run is complete, take a look at the machine’s information in Sal. You’ll now see a “Facter” toggle with all of those neat facts for that client machine.
Faster Client Configuration:
One of the instructions as part of my Sal setup post, as well as part of the official documentation, is to set the client’s preferences for Sal URL and the Machine Group key for it to use. This was done using the defaults command to write the preferences to the com.salsoftware.sal preferences domain.
Instead of using defaults at the command line, we could also provide a simple .plist file that contains the two keys (machine group key, and URL) and two values, and place that in /Library/Preferences/com.salsoftware.sal.plist. However, relying on .plist files to load preferences is problematic with cfprefsd, the preference caching daemon introduced in 10.9 Mavericks.
Well, if you can do it with defaults, you can do it with configuration profiles! Configuration profiles (also known as .mobileconfig files) allow us to enforce preference domain values – such as enforcing the key and URL values for com.salsoftware.sal.
Making a configuration profile by hand is madness, so it’s better to use a tool that already produces profiles effectively – such as Profile Manager, Apple Configurator, or any MDM suite. That’s a lot of work just to get a profile, though.
Instead, we can thank Tim Sutton for his awesome mcxToProfile script, which takes a .plist or existing MCX object and converts it into a profile. We could use mcxToProfile to convert an existing com.salsoftware.sal.plist into a profile, but that means we now need to handcraft a .plist file for each Machine Group key we create.
I’m not a fan of manual tasks. I’m a big fan of automation, and I like it when we make things as simple, automatic, and repetitive as possible. We want a process that will do the same thing every time. So rather than create a plist for each Machine Group I want a profile for, and then run the mcxToProfile script, I’m going to write another script that does it for me.
#!/usr/bin/python

import argparse
import os
from mcxToProfile import *

parser = argparse.ArgumentParser()
parser.add_argument("key", help="Machine Group key")
parser.add_argument("-u", "--url", help="Server URL to Sal. Defaults to http://sal.")
parser.add_argument("-o", "--output", help="Path to output .mobileconfig. Defaults to 'com.salsoftware.sal.mobileconfig' in current working directory.")
args = parser.parse_args()

plistDict = dict()

if args.url:
	plistDict['ServerURL'] = args.url
else:
	plistDict['ServerURL'] = "http://sal"

plistDict['key'] = args.key

newPayload = PayloadDict("com.salsoftware.sal", makeNewUUID(), False, "Sal", "Sal")

newPayload.addPayloadFromPlistContents(plistDict, 'com.salsoftware.sal', 'Always')

filename = "com.salsoftware.sal"

filename+="." + plistDict['key'][0:5]

if args.output:
	if os.path.isdir(args.output):
		output_path = os.path.join(args.output, filename + '.mobileconfig')
	elif os.path.isfile(args.output):
		output_path = args.output
	else:
		print "Invalid path: %s. Must be a valid directory or an output file." % args.output
else:
	output_path = os.path.join(os.getcwd(), filename + '.mobileconfig')

newPayload.finalizeAndSave(output_path)
Looking at the script, the first thing we see is that I’m importing mcxToProfile directly. No need to reinvent the wheel when someone else already has a really nice wheel with good tires and spinning rims that is also open-source.
Next, you see the argument parsing. As described in the README, this script takes three arguments:
the Machine Group key
the Sal Server URL
the output path to write the profiles to
The payload of each profile needs to be enforced settings for com.salsoftware.sal, with the two settings it needs – the key and the URL. The URL isn’t likely to change for our profiles, so that’s an easy one.
First, initialize mcxToProfile’s PayloadDict class with our identifier (“com.salsoftware.sal”), a new UUID, and filler content for the Organization, etc. We call upon mcxToProfile’s addPayloadFromPlistContents() function to add in “always” enforcement of the preference domain com.salsoftware.sal.
The obvious filename to use for our profile is “com.salsoftware.sal.mobileconfig”. This presents a slight issue, because if our goal is to produce several profiles, we can’t name them all the same thing. The simple solution is to take a chunk of the Machine Group key and throw it into the filename – in this case, the first 5 letters.
Once we determine that our output location is valid, we can go ahead and save the profile.
On OS X, plists can be handled and parsed easily because it’s built into the Foundation libraries. mcxToProfile itself incorporates several functions from Greg Neagle’s FoundationPlist library, which does improved plist handling compared to Python’s built-in plistlib.
Because of the reliance on the OS X Foundation libraries, however, we can’t use FoundationPlist outside of OS X. Since Sal is built to run on multiple platforms, and the Docker image is built on Ubuntu, we can’t use FoundationPlist as the core of our plist handling functionality.
Thus, we’ll need to make some adjustments to mcxToProfile:
try:
	from FoundationPlist import *
except:
	from plistlib import *
In Tim Sutton’s original version of the script, he imports the necessary Foundation libraries into Python for use of them, and inline copied the parts of FoundationPlist he needed. If we’re going to make this more cross-platform friendly, we need to remove those dependencies.
So in my revision of mcxToProfile, I’ve removed all of the FoundationPlist functions completely from the code, instead relying on bundling a copy of FoundationPlist.py with the project. Instead of importing Foundation libraries, we’re going to try to use FoundationPlist – and if any part of that import goes wrong, we just abandon the whole thing and use Python’s built-in plistlib.
Dirty, but effective, and necessary for cross-platform compatibility.
Now we have a simple script for generating a profile for a Machine Key and URL for Sal that can run on any platform.
Automating the script:
Generating a single profile is a useful first step. The ultimate goal is to be able to generate all of the profiles we’ll need at once.
This script was written in Bash, rather than Python. You can find it in the Github repo here:
#!/bin/bash

profile_path=`printenv PROFILE_PATH`
if [[ ! $profile_path ]]; then
	profile_path="/home/docker/profiles"
fi

oldIFS="$IFS"
IFS=$'\n'
results=$( echo "SELECT key FROM server_machinegroup;" | python /home/docker/sal/manage.py dbshell | xargs | awk {'for (i=3; i<NF-1; i++) print $i'} )
read -rd '' -a lines <<<"$results"
IFS=$oldIFS
for line in "${lines[@]}"
do
	if [[ -z $1 ]]; then
		/usr/local/salprofilegenerator/generate_sal_profile.py $line --output $profile_path
	else
		/usr/local/salprofilegenerator/generate_sal_profile.py $line --url $1 --output $profile_path
	fi
done
It’s ugly Bash, I won’t deny. The README documents the usage of this script in detail.
The assumption is that this will be used within the Sal Docker container, and thus we can make use of environment variables. With that assumption, I’m also expecting that an environment variable PROFILE_PATH gets passed in that can be used as the location to place our profiles. Absent the environmental variable, I chose /home/docker/profiles as the default path.
IFS=$'\n'
The purpose of the IFS here is to help parse a long string based on newlines.
The actual pulling of the machine group keys is the complex part. I’m going to break down that one liner a bit: echo "SELECT key FROM server_machinegroup;"
This is the SQL command that will give us the list of machine group keys from the Postgres database.
python /home/docker/sal/manage.py dbshell
This invokes the Django manage.py script to open up a database shell, which allows us to execute database commands directly from the command line. Since dbshell opens up an interpreter, we’re going to pipe standard input to it by echoing the previous SQL query.
xargs
Without going into a huge amount of unnecessary detail about xargs, the purpose of this is simply to compress the output into a single line, rather than multiple lines, for easier parsing.
awk {'for (i=3; i<NF-1; i++) print $i'}
Pretty much any time I start using awk in Bash, you know something has gone horribly wrong with my plan and I should probably have just used Python instead. But I didn’t, so now we’re stuck here, and awk will hopefully get us out of this mess.
In a nutshell, this awk command prints all the words starting at 4 through the last-word-minus-two. Since dbshell queries produces output at the end saying how many rows were produced as a result, we need to skip both the number and the word “rows” at the very end. The parsing works out because we set the IFS to divide words up based on newlines.
Ultimately, this handles the odd formatting from dbshell and prints out just the part we want – the two Machine Group keys.
read -rd '' -a lines <<<"$results"
This takes the list of Machine Group keys produced by the long line and shoves it into a Bash array.
for line in "${lines[@]}"
The for loop iterates through the array. For each key found in the array, call the generate_sal_profile.py script.
As the README documents, the shell script does handle a single shell argument, if you want to pass a different URL than the default. If a shell argument is found, that is used as a --url argument to the generate_sal_profile.py script.
By calling the script, we now get a .mobileconfig profile for each Machine Group key. Those profiles can be copied off the Sal host (or out of the Sal container) and into a distribution system, such as Profile Manager, an MDM, or Munki. Installing profiles on OS X is a trivial matter, using the profiles command or simply double-clicking them and installing them via GUI.
Munki is a very useful tool. Munki with Sal by itself is a useful tool, but the best tools are ones that can be extended. Munki, Sal, and Facter provide great information about devices. Making Sal easy to install lessens the burden of setting it up, and makes the entire process of migrating to a more managed environment simpler.